
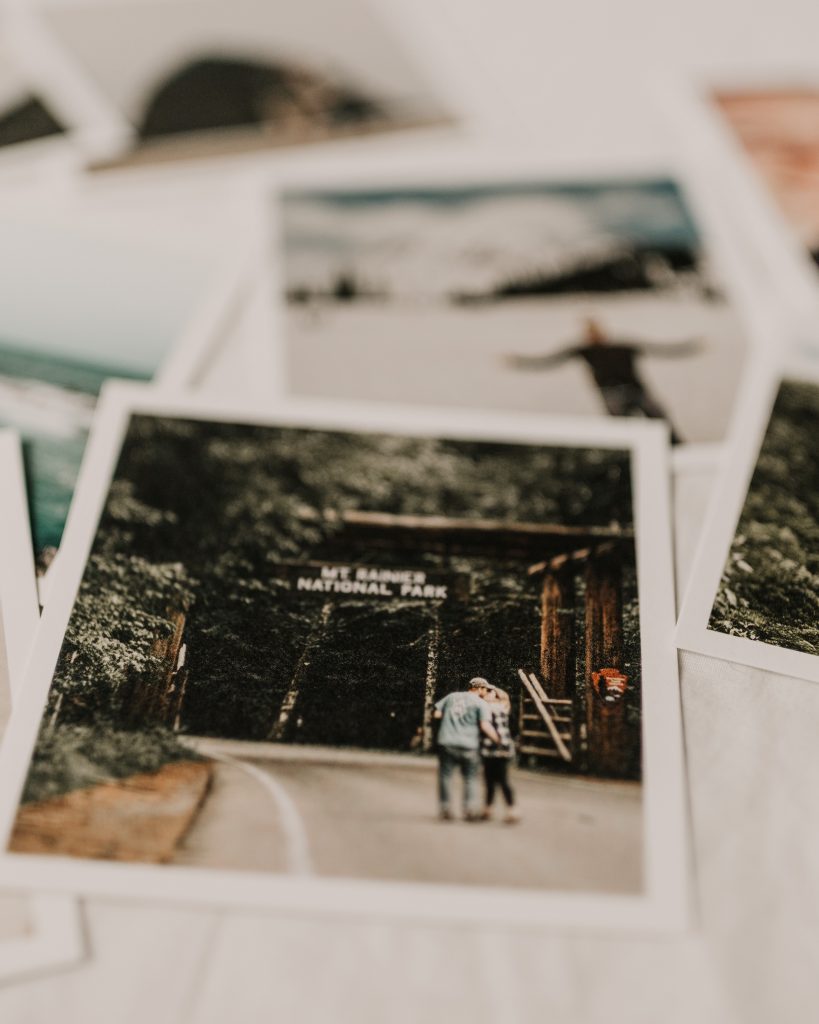
Photographs are one of the most coveted historical records. Since their creation, photographs have provided a visual record of the world and its inhabitants. Today, they serve as a way for us to connect with various events, places, and figures from history.
Because photographs are so tremendously important to us, we should be using the right supplies to preserve them to ensure their longevity, but are you using the right ones?
Table of Contents
- Introduction
- What’s Considered a Photograph?
- Why You Should Use Archival Supplies
- How You Should Store Your Photos
- Archival Brands I Trust
- The 10 Do’s and Don’t’s of Photo Preservation
- 3 Simple Steps to Preserve Your Photos
Introduction
I wrote this post with the intention of correcting a few well-meaning, but very wrong suggestions for how to organize and store printed photographs.
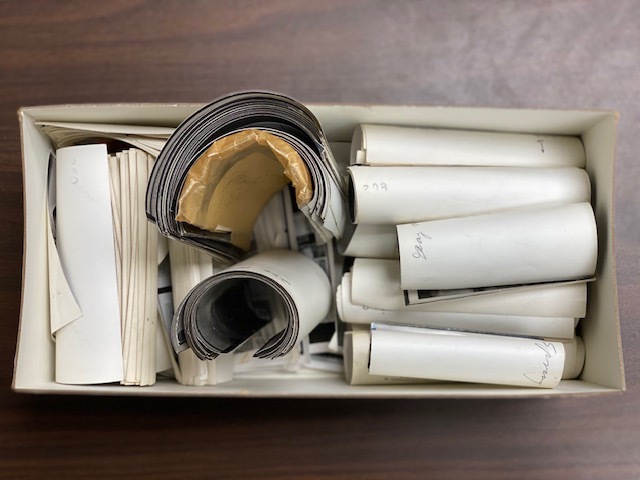
I recently stumbled upon a blog post that was written by a well-intentioned blogger suggesting that people could store their photographs in plastic sandwich bags. While this seems like a quick, economical idea, it’s actually the worst thing you could ever do to your photographs.
NEVER, AND I MEAN NEVER, use a plastic sandwich bag (or anything plastic for that matter) to store your photographs!
-Me, in agitation
As plastic ages, it breaks down. When it breaks down, it becomes sticky and permanently affixes itself to the surface of what it surrounds, in this case your photographs. It is nearly impossibly to scrape off without the risk of damaging your photograph.
I’ve seen other well-meaning bloggers suggesting that storing your photographs in plastic bins is also alright, but these have the same problem as sandwich bags. Again, as the plastic ages, it off-gases which rapidly deteriorates your photographs.
As a professional archivist, believe me when I say that using the WRONG STORAGE will cause irreparable damage to your photographs.
So, then, what should you do, instead? Keep reading for all of your answers and more!
What’s Considered a Photograph?
So, as mentioned above, I’m not talking about the care of your digital photos (hello, iCloud!) in this particular post.
I’m talking about your beloved printed photographs, whether from the 1800s, 1900s, or even the 2000s (bonus points if you read that as the “20 hundreds”).
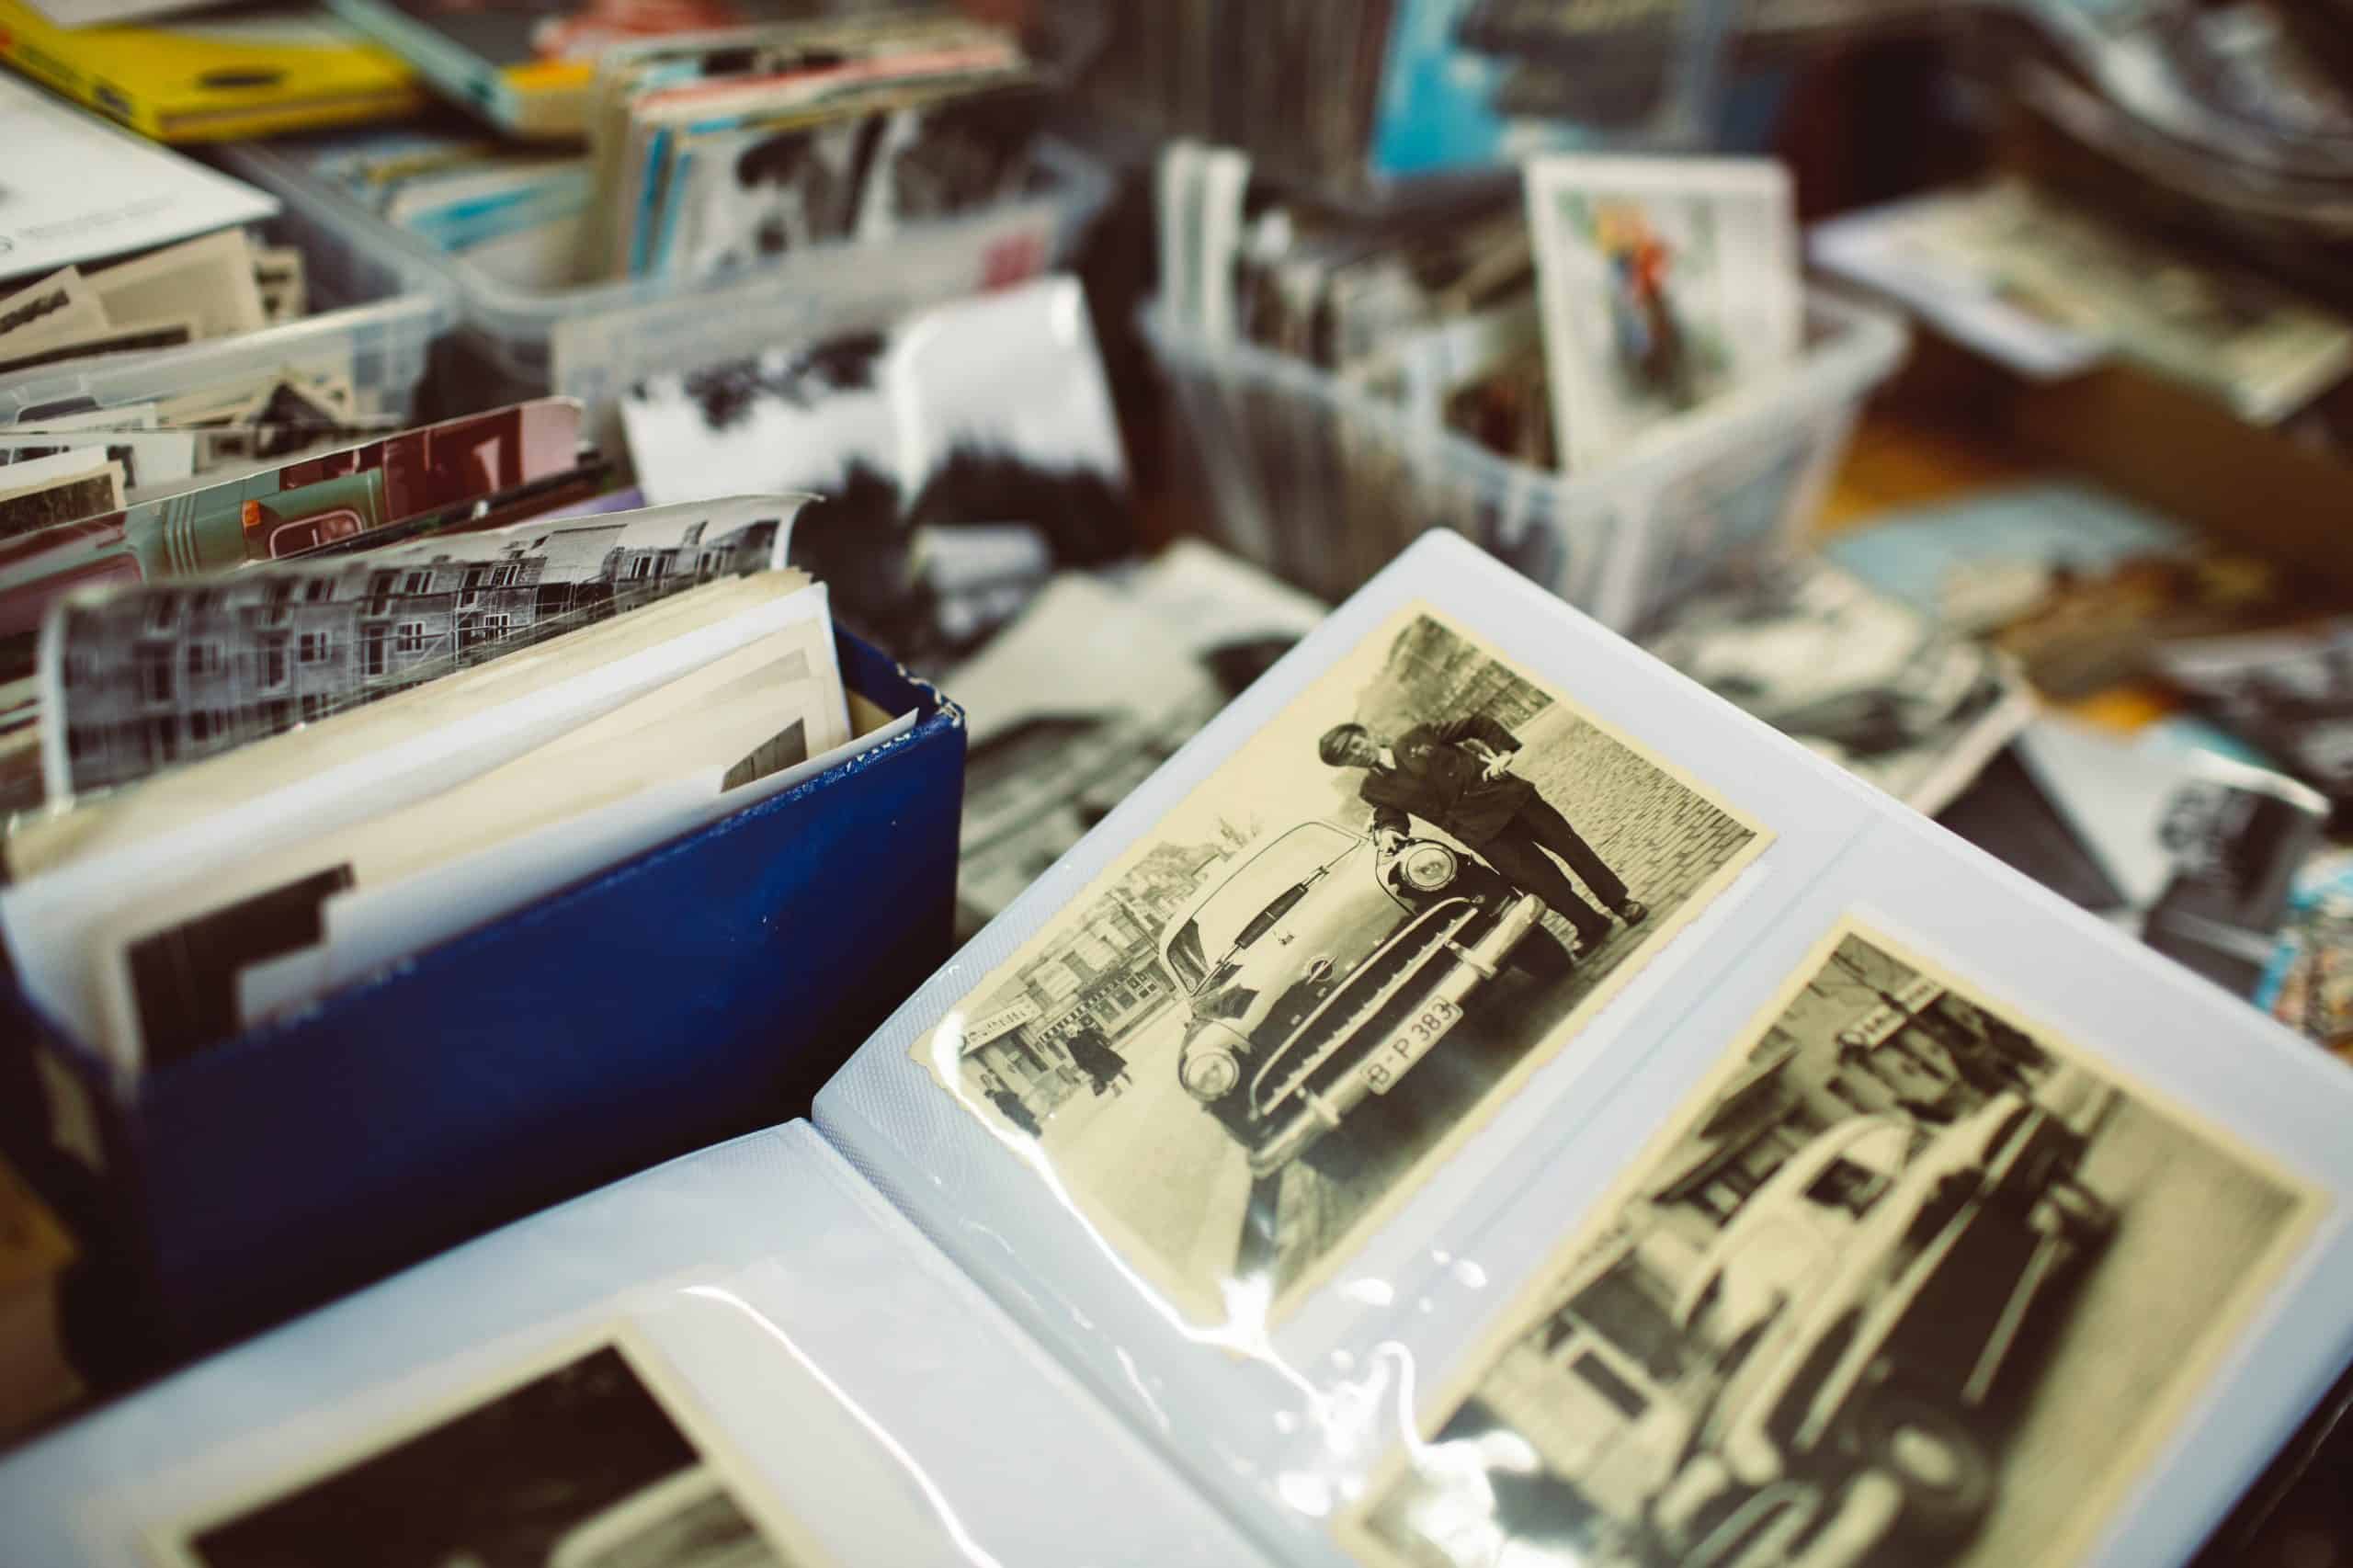
Unlike digital photos which are located (somewhat) safely in your digital devices, printed photographs are typically found suffocating in the plastic of a non-archival photo album or are trapped in a grimy plastic tub in the attic or basement, stacked layer upon layer so deep that it looks like an English trifle of precious family memories.
I’m offering you this guide to assist you in the correct ways to organize and store your photographs from certain peril!
Preserving your photos is easy. You just need to have the right approach. After reading this post, you’ll have all your photos perfectly preserved before you can say ‘I love archiving!’
Pro tip: if you find that you are feeling overwhelmed at the prospect of preserving all of your photos, come talk with me about working together to save your photographs!
Why You Should Use Archival Supplies
I want to include a brief note about the importance of archival supplies before we begin.
As I noted above, I’ve seen a great deal of bloggers suggesting that plastic is the correct way to store and organize photographs. While their intentions are in the right place, their advice, unfortunately, isn’t all too sound.
Archival supplies are made of preservation-friendly materials that ensure their proper storage. These supplies have been tested and perfectly formulated to slow the aging and eventual decay of your most prized documents, photographs, newspapers, clothing, etc. There’s an archival enclosure for everything! (Believe me, if I could store everything in my house in archival enclosures, I totally would! #archivistlife)
So, then, what kinds of archival supplies are there for photographs?
Say No to Plastics & Adhesives!
You might be sick of hearing me say this already, but I really mean it: Plastic is the mortal enemy when trying to preserve anything. As it ages, it breaks down, causing it to become adhesive and glue itself to whatever it touches. It’s near impossible to remove your photos from plastic sleeves like this so your photos can be irreparably damaged.
I’m only adamant about this point because I have seen this happen a million and one times throughout my career as an archivist.
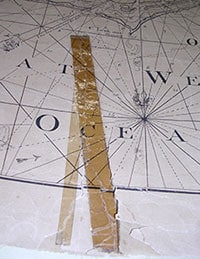
In addition to the hazards of plastic, there are other hazards that can attack your beloved photographs: adhesives and staples. Next to plastics, these are some of the worst offenders to the care and keeping of photographs as well as documents. When I say adhesives I mean glue, tape, rubber cement, and basically anything that you use to stick one thing to another.
Please, please, please…if you don’t take anything else from this post, just remember to never, ever use plastic, tape, rubber cement, paperclips, staples, or rubber bands on your photographs!
These are just a few examples of the kind of damage that can be caused by various types of adhesives. All of these incidences could have been avoided with a little bit of foresight toward preservation!


How You Should Store Your Photos
So now we know that plastics, adhesives, and staples (oh my!) are terrible for the longevity of photographs. Great!
There’s just one more thing to keep in mind.
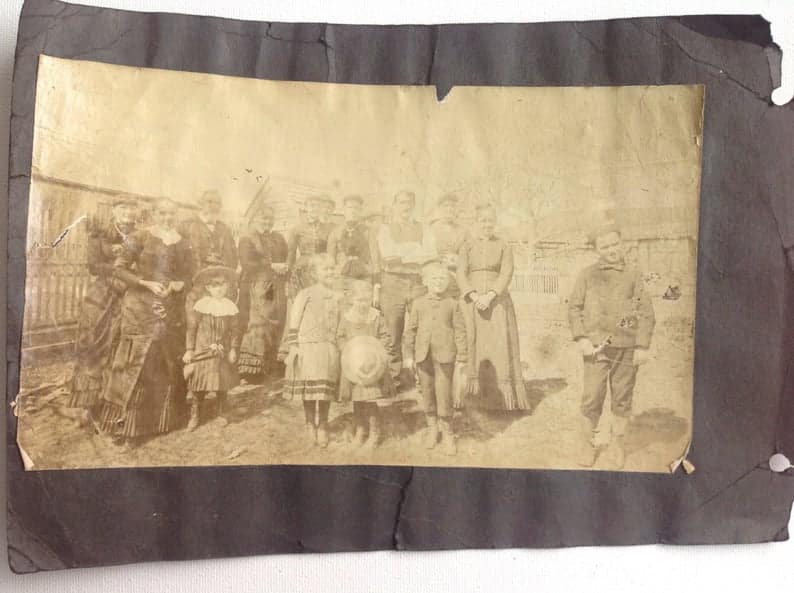
In addition to adhesives, standard manila file folders, copy paper, and cardboard boxes are also hazardous to use when storing your photos. Paper products like these are highly acidic, meaning that they will cause your photos to degrade into nothingness much faster than they should.
Preservation specialists, like archivists, use acid-free folders, acid-free paper, and acid-free, lignin-free boxes to prevent the acidification of materials.
Here are two of my favorite ways to store photos. I use these methods when I work on archival collections and they are so easy!
Archival Photo Sleeves & Photo Albums
Photographs that are stored in a box can begin to curl with age. If this process isn’t intercepted early enough, these photos may become brittle and start to crack once you try to straighten them, causing permanent damage to the photo.
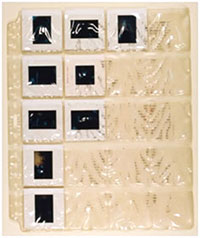
I strongly advise that you store your photographs in archival photo sleeves. These make life soooo much easier when you’re trying to look for a photo. You have a clear view of your photographs and you know that they are fully protected from the oils of your hands or the environment.
Archival photo sleeves are made of polyethylene, polypropylene, or polyester. These materials won’t break down and stick to your photos like regular plastic sleeves. Polyester sleeves are expensive, though, so I tend to use the ones made of polyethylene or polypropylene.
But, Amara, how am I supposed to store a bunch of floppy polyethylene or polypropylene sleeves?!
Well, I’m glad you asked! You can store your sleeves in an acid-free, lignin-free photo album like this one. This album perfectly encloses your sleeves, providing an extra layer of protection from humidity, light, and household pests. Here is a more budget-friendly option.
Of course, if you don’t want to store your photos in archival sleeves, you can always use archival photo corners in a scrapbook with acid-free pages. I do feel, however, that this method takes more time and doesn’t guarantee the safety of your photos, but it’s entirely up to you how you want to store and access your materials. Please just make sure that your supplies are acid-free and lignin-free!
Archival Brands I Trust
When purchasing archival supplies, there are a few trusted brands that archivists tend to use. Hollinger Metal Edge, Gaylord Archival, and Archival Methods are all great options since they offer a wide variety of boxes and supplies.
When it comes to photographs, I typically stick with Hollinger or Gaylord for enclosures and B&H Photo for their archival sleeves. I use B&H because they have archival sleeves for a fraction of the price that Hollinger sells them. And who doesn’t love to save some cheddah?!
“Can I Write on the Back of my Photos?”
If you find that you need to write down information (like dates, names, or places) on the back of a photo, use a pencil or an archival pen and write VERY LIGHTLY. I do recommend only ever using pencil, though, in case of boo-boos. You can always erase pencil!
Wanna know a secret? I never write on the backs of photos.
What I typically do is cut a piece of acid-free paper down to the size of the archival sleeve pocket and write on that instead. Slide that piece of paper in the sleeve so it’s back-to-back with your photo. This way you can see what’s written on the paper without having to remove it! I prefer to use this method since I know that I won’t be causing any damage to my photo.
The 10 Basic Do’s and Don’t’s of Photo Preservation
These are the basic Do’s and Don’ts to adhere to when storing your photographs. If you have any questions while going through this process, don’t be afraid to contact me here!
The Do’s
This list is the absolute minimum you need to do when preserving your photographs. If you are interested in more advanced archiving, feel free to reach out to me here and I can set you up with additional resources!
DO preserve your photos using archival supplies.
Preserve your photos using archival sleeves, archival albums, archival binders, or whatever just so long as it’s archival! Using archival enclosures ensures the longevity of your photographs.
When selecting archival sleeves, choose ones that are made of polyethylene, polypropylene, or polyester. These will not break down like traditional plastics. For archival albums and binders, make sure your pages are acid-free and that the enclosure where you’re storing your pages is acid-free, lignin-free and plastic-free.
DO store your photos in a cool, dry place.
Store your photos in a cool, dry place. The optimal temperature for photos is 75 °F, which means that they should be stored in your actual living space (maybe in a nice, clean, dry closet). Also, make sure that this place is out of direct sunlight. Think of your photos as little vampires that vant to be in the dark!
DO use pencil or an archival pen to label your photos.
Use either pencil or archival pen if you need to write on the backs of your photographs. Also, make sure that you write gently so that you don’t leave impressions on the front of your photos.
Professional archivists’ tip: If you choose to use archival sleeves, instead of writing directly on the photo, write on a piece of acid-free paper with your pencil or archival pen. Slide that piece of paper in the sleeve so it’s back-to-back with your photo. This way you can see what’s written on the paper without having to remove it!
DO use a clean workspace.
Make sure that your workspace is clean before you begin. Wipe away all the little crummies from your chip binge last night so that they don’t become one with your photos.
Also, make sure that this is an area where you can leave your items without them getting disturbed. If you use your dining room table every night, that probably isn’t the best place to set up shop. You could purchase a small collapsible table and put it off to the side somewhere in your house.
DO store your photos flat.
Store your photos flat (meaning horizontal). If you store them vertical, they’ll start to sag with time (just like us!) and this will damage them or make them curl beyond repair.
The Don’ts
Don’t feel stressed out by these “Don’ts”! This is just to make sure that you take the utmost care when you’re working on preserving your photos! Again, if you have questions, just ask me! 🙂
DON’T use your bare hands.
Cover your grubby little mitts! Your hands have oils that will transfer to your photos and cause them to degrade over time. Basically, your hands are eating away at your precious memories…noooooo!
Contrary to popular belief, archivists don’t actually wear the stereotypical white cotton gloves that you see in movies. Instead, we wear latex-free nitrile examination gloves just like doctors (but we’re way cooler than doctors…sorry, not sorry)!
DON’T, under any circumstance, use plastic.
Sick of hearing this yet?
I cannot stress this point enough! As it ages, plastic breaks down and adheres to the surface of whatever it surrounds, in this case it would be your photos. This causes irreparable damage! You can try to peel off the plastic, but I’ve seen it happen before. You won’t just be peeling off the plastic, you’ll also be peeling away the top layer of your photo.
DON’T store your photos where there is a lot of moisture, humidity, or heat.
Where you store your photos is just as important as what you store your photos in. Never (and I mean never!) store them in a humid location or in an area prone to water leakage! This means no attics, no basements, no garages, no toilets, no ovens…you get the point.
In addition to you causing your photos to warp, both the heat and humidity can cause mold growth on your photos.
DON’T use rubber bands, adhesives, staples, or paper clips.
Do not use/keep rubber bands, tape, paperclips, adhesives of any kind, staples, etc. on your photos! If there are some on your photos already, remove them like your life depends on it!
DON’T eat or drink in your work station.
Now that you’re an AIT (archivist-in-training) it’s time that you learn the golden rule of archiving: you must refrain from eating, drinking, smoking, doing drugs, shaving your ears, trimming your nose hairs, etc. near your archival materials.
One time at work, I had a bottle of very fizzy and (apparently) explosive kombucha that I foolishly opened over a very rare collection that I was working on. Thankfully, I did not leave my own mark on that collection, but it was a heart-stopper moment for sure.
3 Simple Steps to Preserve your Photographs
Now that you know the Do’s & Don’ts, it’s the moment you’ve been waiting for: the actual steps to organizing and storing your photos!
These are just the very basic steps that you will need to accomplish in order to preserve your photographs.
If you need help in any way or have some burning questions about archiving, feel free to reach out to me. 🙂
Step 1: Sort Your Photos
In this initial step, you want to first ask yourself how you want to access your photos in the future. Do you want to view them in chronological order, or do you prefer to view them by events like marriages, birthday parties, family picnics, vacations?
You can also choose to store them by event and then in chronological order within each event. It’s entirely up to you and what you feel is right for your exact collection!
Every collection is unique so there really isn’t a right or wrong way. Most of my clients do, however, tend to want their personal photos in chronological order so then they can remember exactly when something happened.
Also, don’t get hung up on getting the exact date right for each photo. If you only have an approximation of the 1970s for a group of your photos, then perfect! Go with that. If you can be more specific, then by all means go ahead!
Your main goal with this first step is simply to assess what you have and figure out how you want to be able to access your photos in the future. What’s going to be easiest to you and what’s going to make the most sense for the future generations that will inherit these some day?
After you’ve figured out how you want your photos to be organized, now is the time where you start sorting! I find that organizing photographs on a large, clean, seldom used, flat surface is the way to go since this project will take some time to complete. You want to have a place where your photos will not be disturbed if you decide to take a few days off from sorting.
Are you finding that it’s too hard to sort your photos because you get caught up reminiscing about each one? Believe me, I totally understand. If you would like someone to come assist you in sorting your photos, feel free to reach out to me. I’m more than willing to help you! 🙂
Step 2: Order Supplies
Once your photographs have been sorted (great job, I knew you could do it!), you can move onto the next step: figuring out how you want to store your photos.
Which method are you going to use? Are you going to use an archival photo album with acid-free photo corners and acid-free pages, or are you going to use archival photo sleeves within an acid-free album enclosure? Both are perfectly acceptable options, so it’s really up to you. 🙂
Archival Photo Album
If you’re using an archival photo album, you can start assembling it like you would do with any other photo album. Make sure you write any interesting tidbits, like names, dates, locations, etc. in pencil or archival pen next to each photo. This way, future generations will know who did what when and where!
Photo Album Shopping List:
Archival Photo Sleeves & Enclosure
If you’re using archival photo sleeves and an acid-free enclosure, it’s time to size up your photos! How many 3x5s do you have? What about 4x6s, 5x7s, or 8x10s? Go through each of your decade/event clumps and figure out how many of each size you will need before you order supplies.
Why? Because I said so, that’s why!
Just kidding, but this step is crucial so that you don’t waste your time or your money.
Archival sleeves typically come in packs of 25, 50, 75, and 100, so you don’t want to overbuy if you aren’t going to need them. We archivists typically operate on a tight budget, so we need to do this step even if there are hundreds and hundreds of photos.
Archival tip: Since photo sleeves are transparent on both sides, you have the option to store your photos back-to-back within each pocket. I typically do this when I’m working on a tight budget or if I don’t have a lot of space to spare.
Photo Sleeves & Enclosure Shopping List:
- Polyethylene or polypropylene photo sleeves
- Acid-free, lignin-free 3-ring preservation album
- Gloves
- Pencil
- Acid-free paper (optional)
Step 3: Figure Out Your Storage Space
As a minimalist, storage is my frenemy; I both love it and hate it. Too much storage space and you can get lured into keeping a bunch of unnecessary items that don’t have value and obscure the items that do. Conversely, if you don’t have enough storage space for the things that actually matter, then your stuff may not be stored in the most preservation-friendly way.
When storing your photographs, there are a few things to keep in mind:
- Photos are sensitive to light. This is why museums and archives rotate their exhibited materials frequently. Otherwise, photos, paintings, and papers will start to fade! Enclosed albums really are the best in order to shield your photos from the evils of this world…oh, sorry I mean the evils of light!
- As mentioned previously, keep them in a part of your house that does not exceed 75°F and has low humidity. Also, make sure that they’re elevated in the event of a leak.
- If you have a photo that’s in a really neat frame you can keep your photograph in it! Just do what museum experts and archivists do and keep it in a dimly lit area, only showing it for a few months at a time. We typically adhere to a “3 months on, 3 months off” rule.
- And finally, store your photos flat so that they do not warp and slump down with time. If you are keeping some photos in their original frames, that’s great! Just make sure that when they’re not on display that you store them flat either front-to-front or back-to-back. This way, you will keep the back parts from scratching the glass on the front!
Congratulations, You’ve Preserved Your Photographs!
Now that your photos are all carefully preserved and stored, I just want to say congratulations! Doesn’t it feel amazing knowing that you’re saving all of those one-of-a-kind memories. Plus, you did it yourself, so kudos to you!
If you’re feeling overwhelmed with all the information, that’s totally normal. Make sure to reach out to me if you have any questions. 🙂
And please remember when you’re going through this process that everything on this planet will break down and decay at some point (including us!), so don’t get upset if this process is already happening. Our primary goal is to slow down this process as much as possible.
Show Me Your Organized Photos!
Which storage options did you end up choosing? How did your photo journey go? Let me know in the comments! I’d love to hear about it! 🙂
Tag me on Instagram @amara_andrew to show me how you end up storing your photos! 🙂